E.1 Perform an inventory (tablet)
You must make an inventory on the tablet for each of these locations. To do this, you should follow the following steps:
- Purge the database then synchronize
- Clean the data from the tablet and download the MEMO database from the internet
- Note: If you have WOs already treated on your tablet, synchronize BEFORE purging, otherwise you will lose all your work
- Define the scope of the inventory,
- You choose the location and its sub-locations on which you will make the inventory.
- Indicate the inventory location,
- For each location (ward, room, floor ... depending on the organization of your tree-view), you indicate where you are.
- Inventory the equipment,
- You indicate the equipment that are found, missing, transferred and you check for those that are not found.
- Finalize the inventory.
- You complete the inventory and synchronize the data with MEMO.
Purge the database then synchronize
- Click on the MENU
 then on SETTING then click on the following button PURGE THE DATABASE
  , then VALIDATE
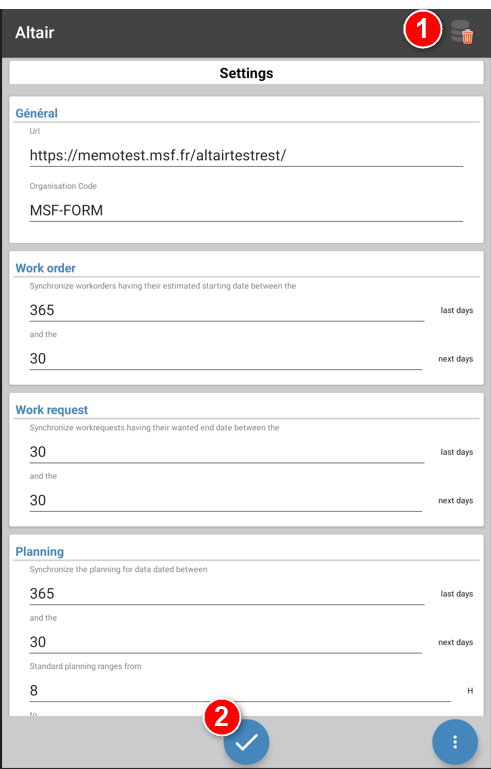
The reason for this action is to erase the data of other users, to empty the data and thus to ensure that the synchronization will perform the exact copy of the MEMO database on the tablet
- Click on GLOBAL SYNCHRONIZATION

Define the scope of the inventory
- Click on the menu
 then click on the option EQUIPEMENT SURVEY
- Click on the button +
 to create a new inventory:
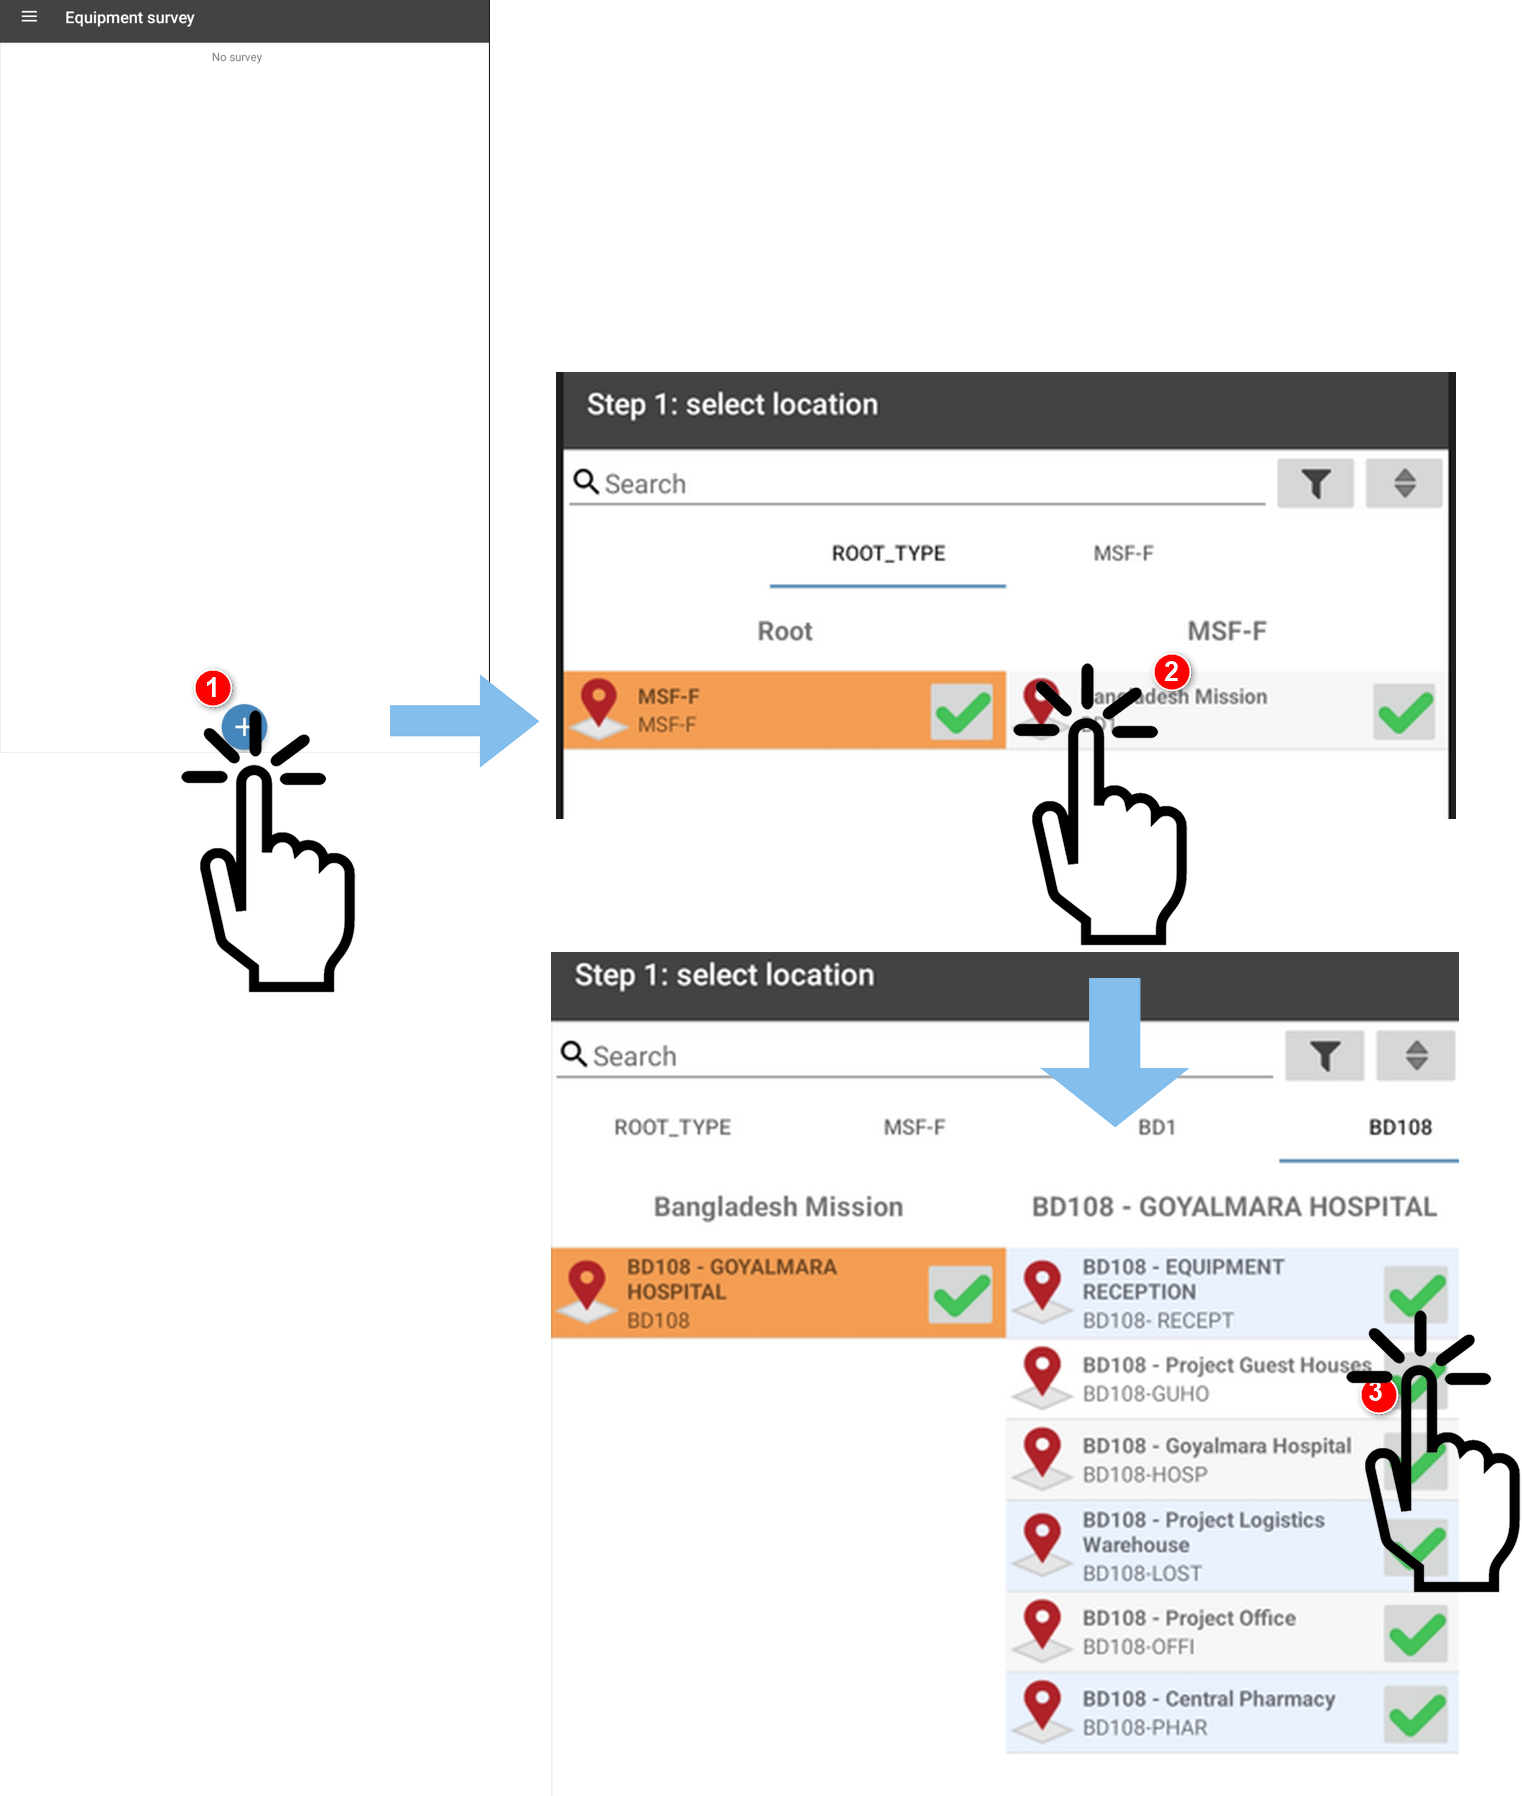
- Browse the project tree-view by clicking on the locations. And click on the button
 of a location to define the inventory scope : You will be able to inventory all equipment of this location and of its sub-locations.
Example : If you make an inventory of guest house, you indicate the location « BD108– Guest house».
Point of vigilance: When choosing the scope of the inventory, ALWAYS choose the primary location.
For example, to inventory ER and then ICU, choose "HOSPITAL" and not Emergencies, in which case you will have to repeat all the steps after synchronizing once the ER inventory is complete.
Start the inventory: indicate the inventory location
You can browse the tree-view by clicking on one location on the list
- Click on the location you want to inventory (the room where you are) in order to select it.
Example: During the hospital inventory, when you enter into the intensive care unit to perform the inventory of its equipment, you indicate the location « Hospital – ICU ». You can come back to list of service of the hospital by swiping the finger from the right to the left.
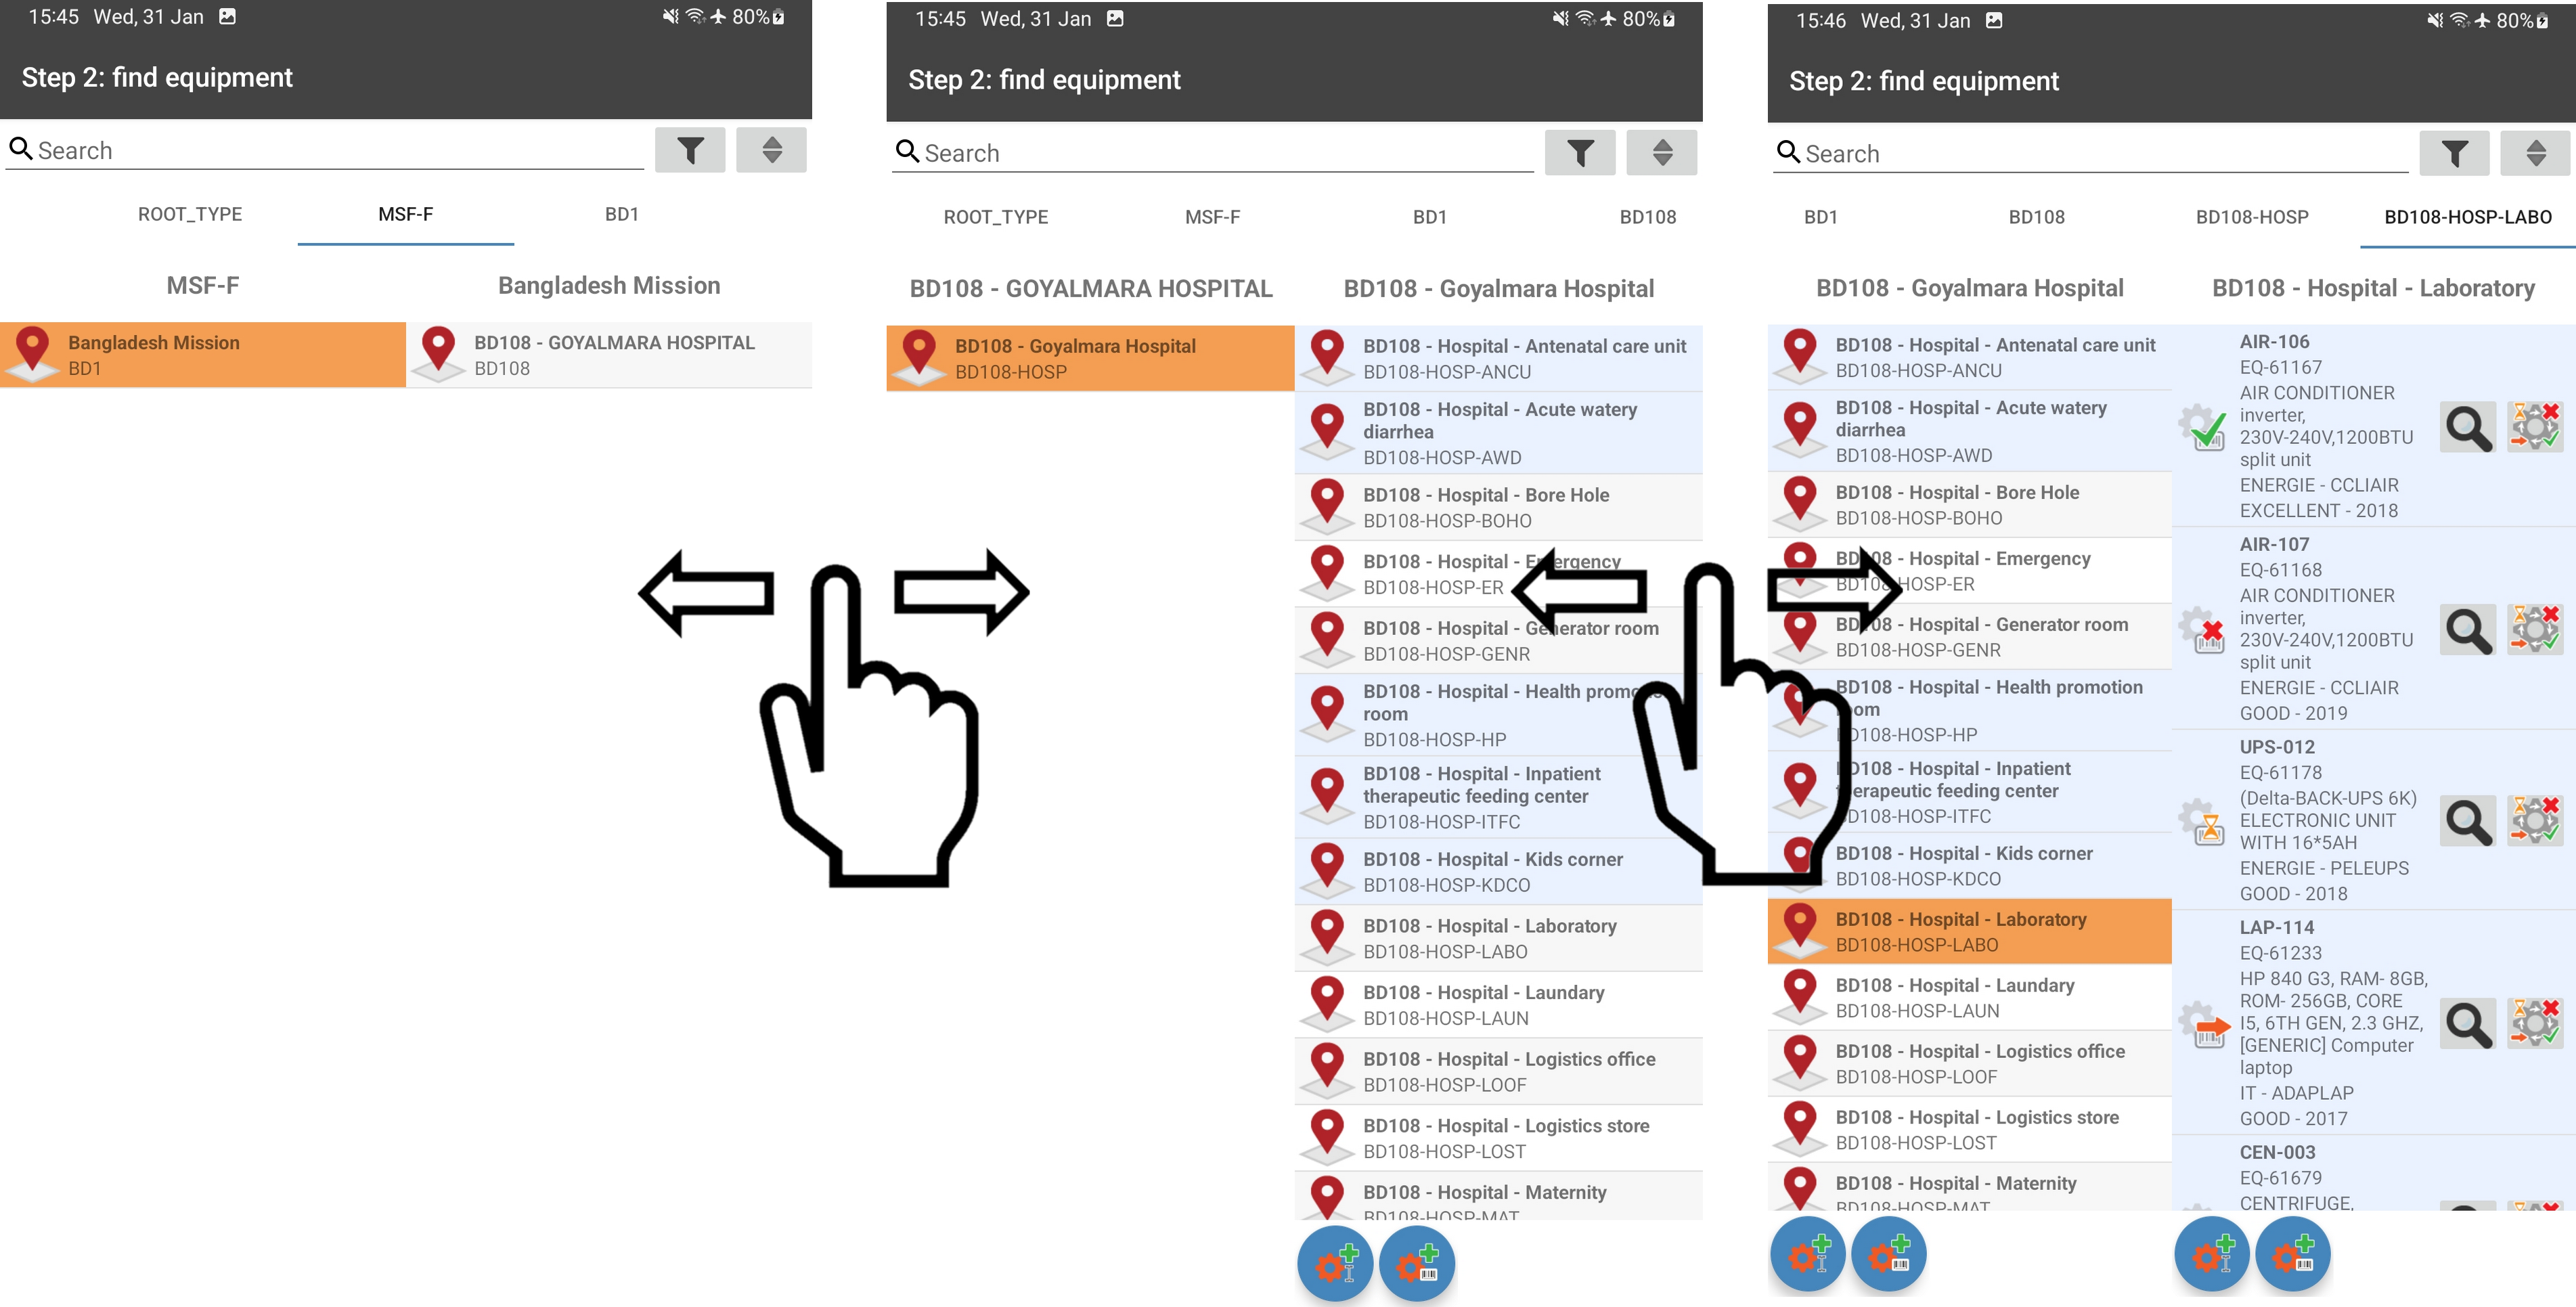
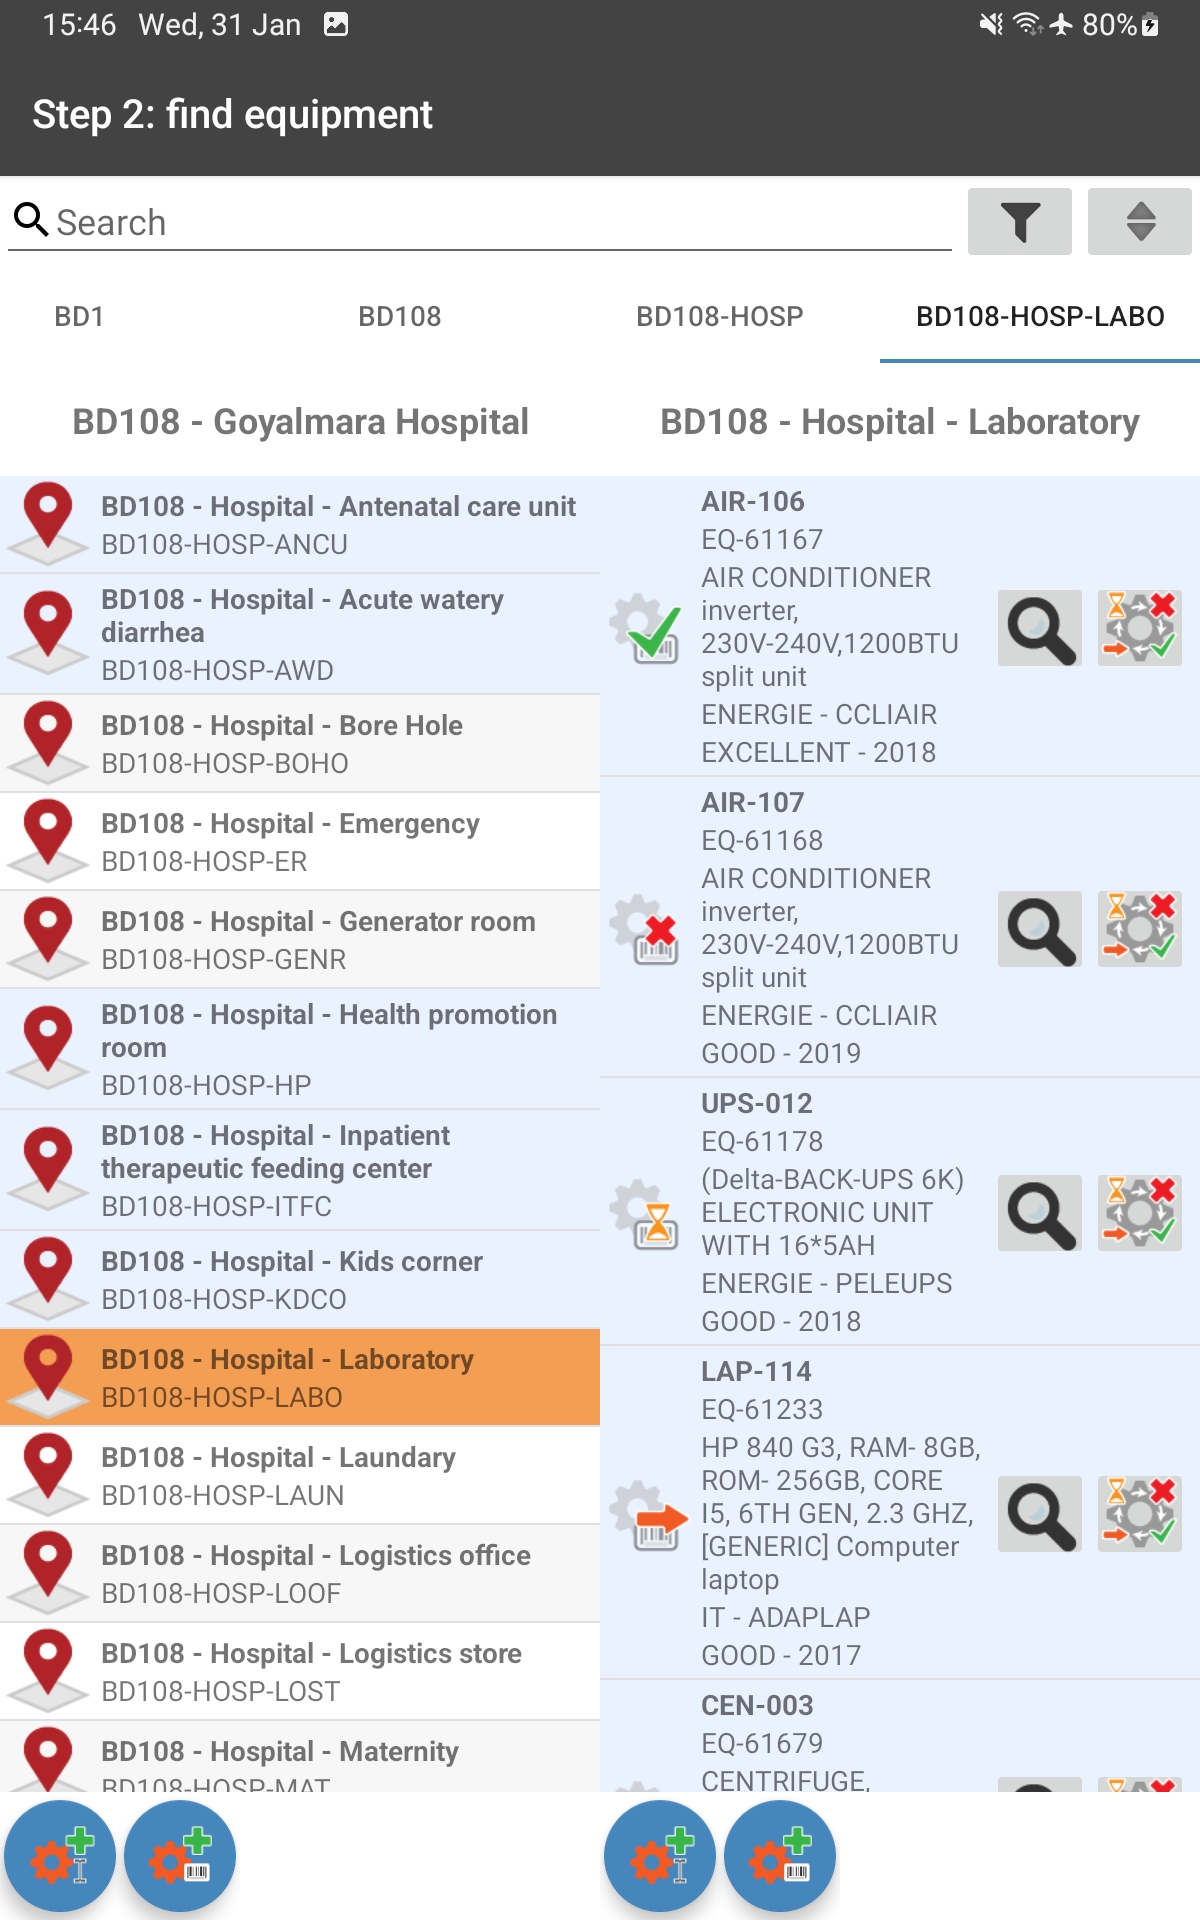
Then you access the list of equipment that are supposed to be present in this location:
The meaning of the different color/button/icon
 Grey background : Equipment inside in this location
 Grey background : Equipment with child : click on it for doing the inventory of the children
 Blue background : location empty (no EQ inside or sub locaton)
 Blue background : No children equipment
 Purple background : Equipment us the result of the filter
 displays its details: Code, MSF number, serial number, note, status and original location. It is also possible to access its “Full record” for have the staff attached. Press
  or < (touch or physical button on the bottom of the tablet) to come back to the inventory.
 Equipment no treated (wait to have an inventory status)
 Found (in the right location) [FR : Trouve]
 Move (found in another location) [FR : Déplacé]
Don't touch again his inventory status!
 Missing [FR : Manquant]
 Change the inventory status manually (found or missing)
 Add an equipment under this location by scanning his MEMO sticker (QRcode or barcode) or by scanning the manufacturing sticker with the QRcode or bare code of the serial number.
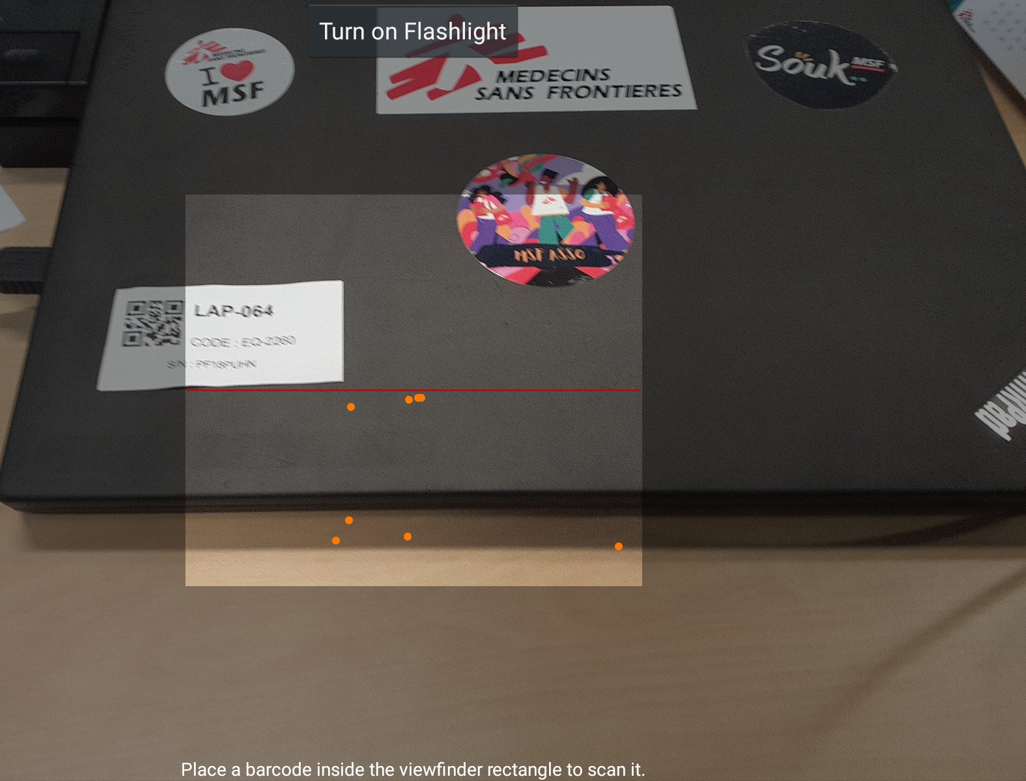 OR
OR 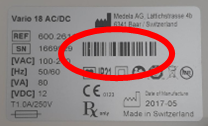
 Add an equipment under this location by filling the equipment code (EQ-XXXX) or his serial number and click OK
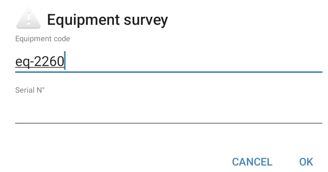 OR
OR 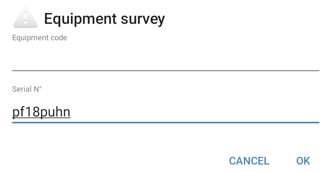
Automatic message possible following these actions:
 : the EQ was already under this location. Now the EQ has the status "FOUND"
 : the EQ was in another location. It is now under this location with the status "MOVE".
Don't touch again his inventory status! If you change to "FOUND", the equipment will be send back to the previous location.

- If you scanned a MEMO sticker, this can mean that :
- The equipment is registered in another mission (another country)
- The equipment was remove of the database by administrator (example : decision LogCo to stop to follow a type of EQ)
If you scanned a manufacturing sticker
- The equipment doesn't exist in MEMO
- The serial number wasn't record in MEMO in the same way than the manufacturing (with space in the sticker, without space in MEMO, or the barcode include (21) like glucometer nova; or in MEMO "to be defined")
- If you filled manually the EQ code :
- The indicated equipment code is spelt incorrectly (example forget to put "-" between EQ and the number)
- The equipment is registered in another mission (another country)
- The equipment was removed of the database by administrator (example : decision LogCo to stop to follow a type of EQ)
- If you filled manually the serial number :
- The indicated equipment code is spelt incorrectly (example record in MEMO with space but you fill without space in the tablet)
- The equipment isn't record on MEMO : You need to create it after the inventory and print a sticker.
Note : If you scan an equipment that is “OUT of Fleet”, MEMO will change the status as in “Stock” and it will re-appear in the fleet. it will appear on the tablet and again in the “equipment” app.
Perform a research, short, filter the equipment
Consult the page dedicated to these functions.
To finalize an inventory
If you press the “Back” physical button  , you will access the ongoing inventory summary.
- This summary displays:
- When the inventory was created
- Who created the inventory
- The inventory location
- The number of equipment with the status :
- « Found »
- « Transferred »
- « Missing »
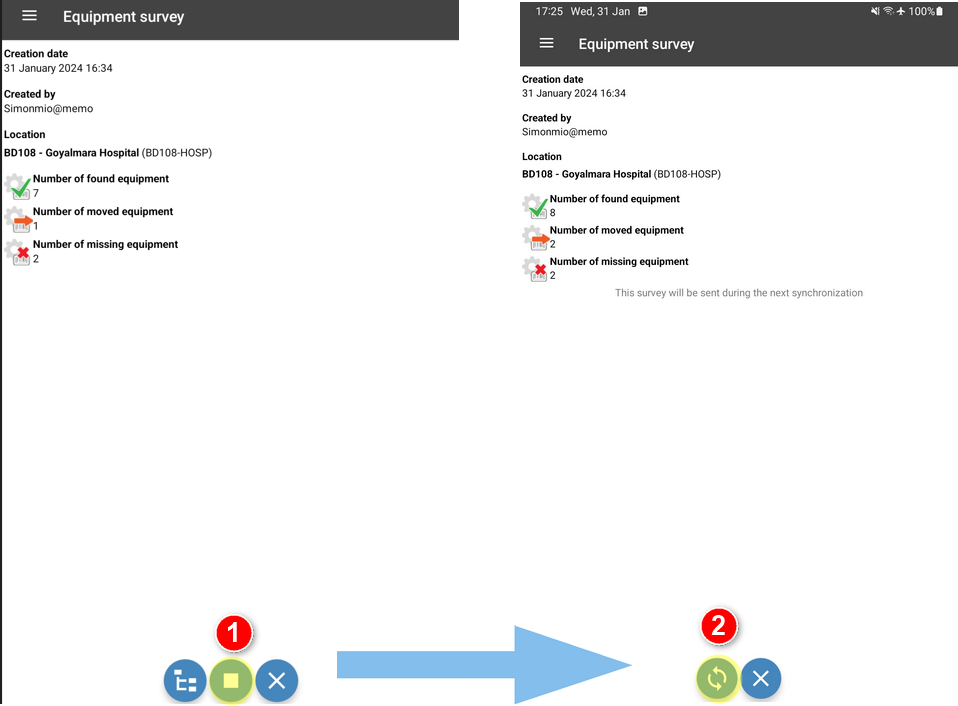
The button  continues the ongoing inventory.
The button  closes the ongoing inventory.
The button  deletes the ongoing inventory.
- Close the inventory by clicking on the bottom STOP

All the inventory data is recorded locally on the tablet but not on the MEMO server, until it is synchronized.
- Enter a Wifi zone and make sure that the tablet is connected, click on the button SYNCHRONISE
 to send the data to MEMO.
Point of vigilance : Wait until the end of the synchronization before moving the tablet (to ensure that the tablet always has the Wi-Fi connection during synchronization)
When the synchronization is complete, the inventory information is visible in MEMO website.
- After tablet synchronization, you need to control the inventory : on the application “Inventory status”, look for the equipment that haven’t been recorded as “FOUND” or “MISSING” or “MOVED”. After having cross checked, you will have to record them as “MISSING” if you cannot find them.