I.2 Confirm the decommissioning of one or more equipment (LogMan)
Before this step, it is necessary that all equipment to be removed has the "TO BE TAKEN OUT OF THE FLEET" box on its page already checked.
- To display the list of equipment to be decommissioned, click on FLEET MANAGEMENT, then on OUT OF FLEET application.
If you need to remove a single piece of equipment, follow this link for the second part of this practical guide.
Case 1: Several equipment to be taken out of the fleet for the same reason on the same date for the same destination
- Select the equipment you wish to take out via the second column. You can select them one by one or select the entire list using the button at the top of the table.
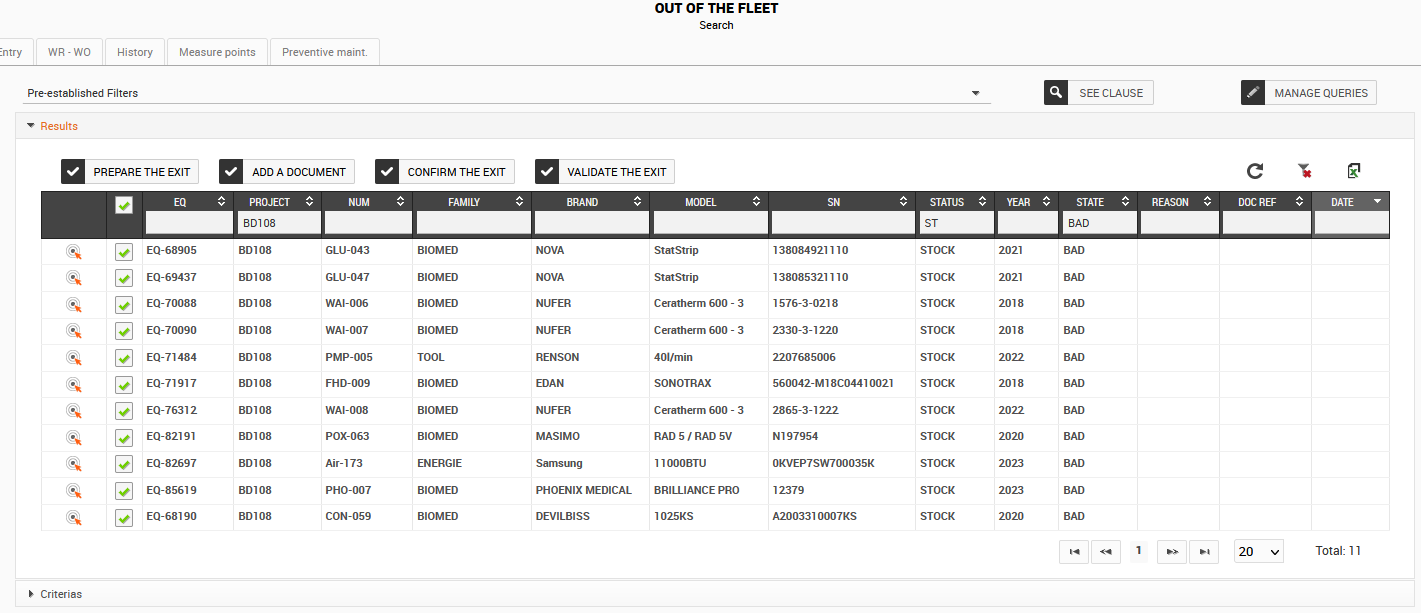
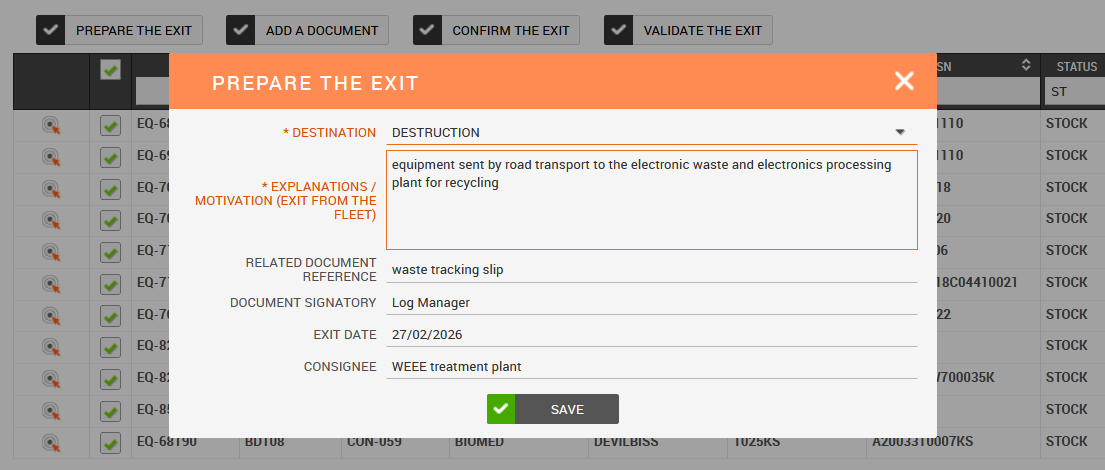
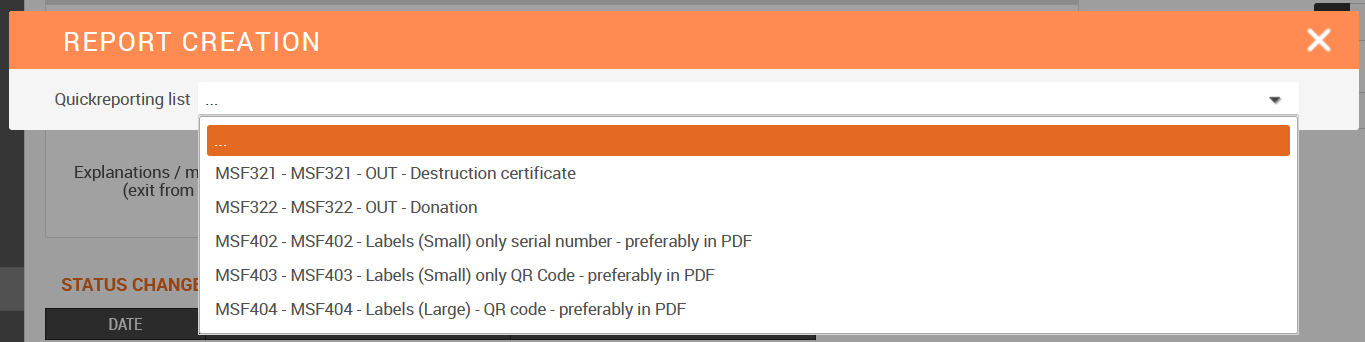
- Click on the "PREPARE THE REQUEST OF EXIT" button to complete all the mandatory fields. Be as precise as possible.
Note: even if your supporting document is already ready, you must use this button so that the information is completed for each piece of equipment. Ignore the generated document.
- Once the supporting document has been completed and signed, click on the ‘ADD A DOCUMENT’ button to attach the document to all the equipment that has been selected.
Note: If you had to reopen the page from the previous step (prepare the exit document), you must reselect the equipment to be removed.
- In the window, click on ‘BROWSE’, select your document and click on CONFIRM AND CLOSE

- Click on ‘CONFIRM THE REQUEST OF EXIST’ and confirm your choice by clicking on ‘YES’
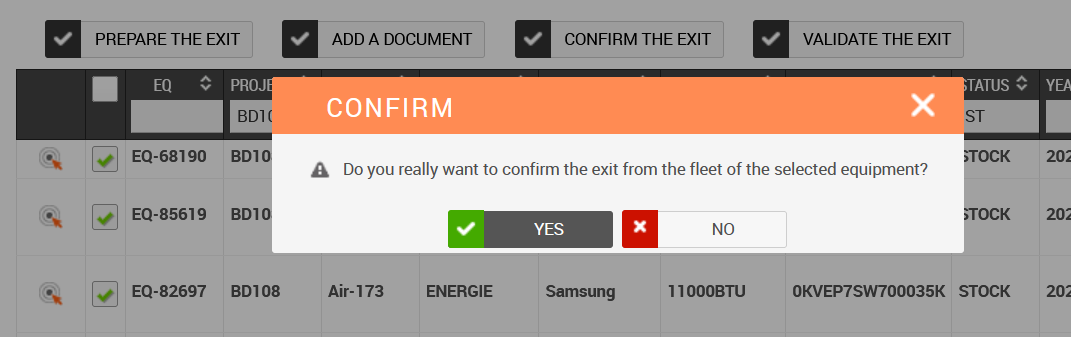
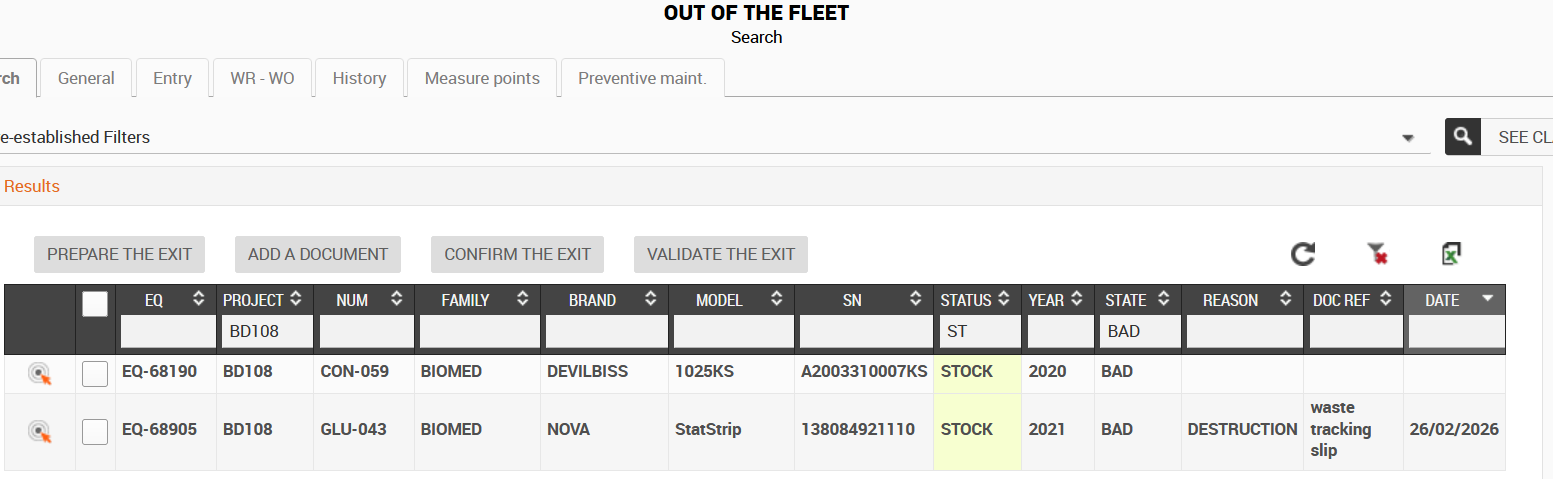
The status of all equipment will change to decommissioned (DECLASS)
The final step is for the Logistics Coordinator to approve the removal from the fleet.
Case 2: confirming the decommissioning of individual equipment
- Open the page for the equipment you wish to remove. It will appear in bold on the page.
- Select the reason from the drop-down list in the ‘OUT OF FLEET’ table.
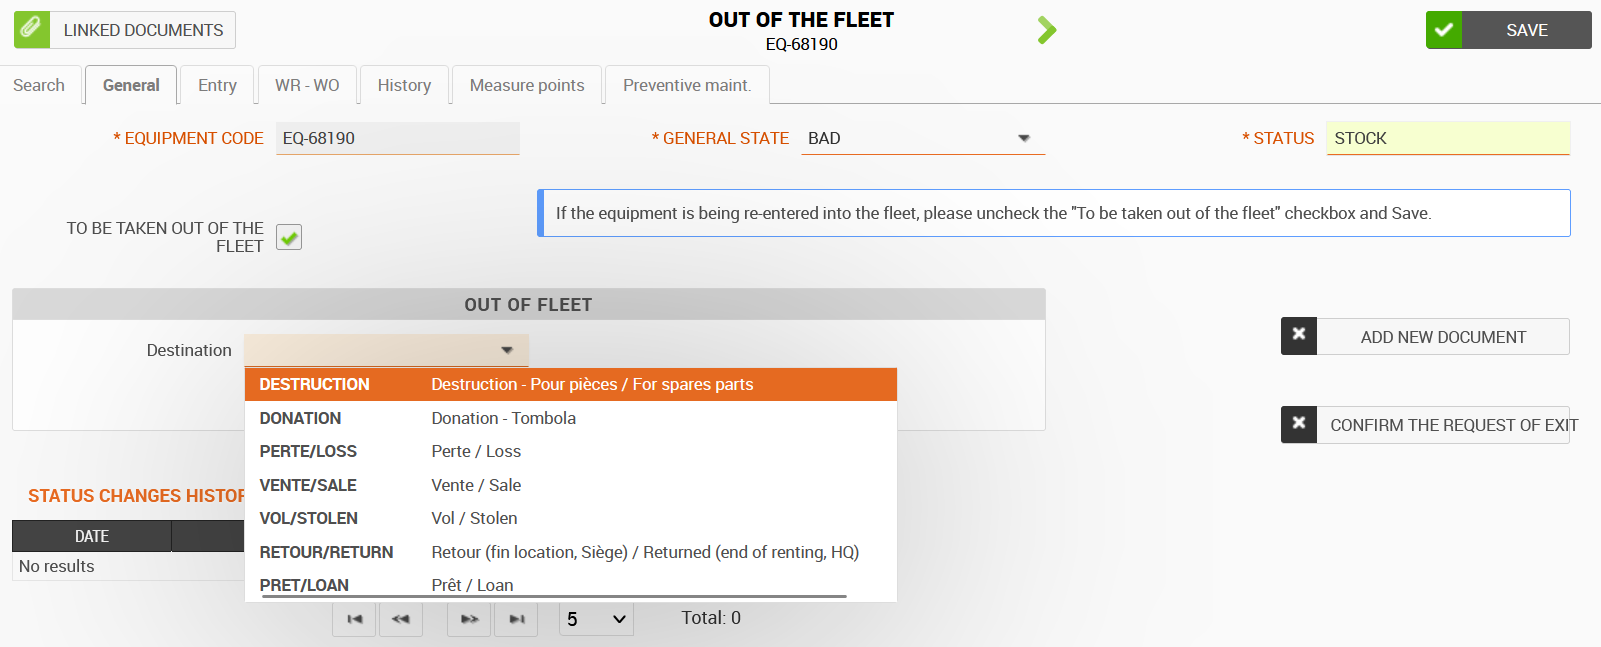
- Complete the other fields.
Tip: You can only complete the explanation if the equipment has not yet been physically removed from the inventory. The other information must be completed before the removal from inventory can be validated.

- Click on SAVE
- Click on ‘CONFIRM REQUEST OF EXIST’
The equipment is now DECLASSIFIED
.

- Once your supporting document has been signed, click on ADD NEW DOCUMENT.
Tip: when the equipment page is open, you can click on the printer icon to download the pre-filled supporting document template with the equipment information.
The next step is validation by the Logistics Coordinator once all the information has been entered and the supporting document attached.