F.1.6 Fill a preventative Work Order (Tablet /laptop)
Computer
(for the tablet click here)
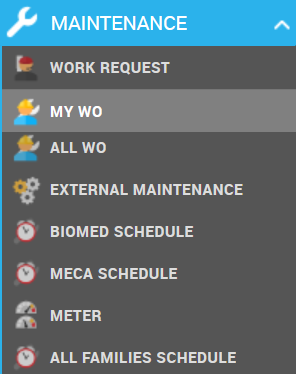
- In the Menu on the left, Under MAINTENANCE Module, click on “MY WO” Application to display the list of WOs assigned to the User.
- Using the arrow button on the left, select the WO to be processed:

You need to fill all information of the work order :
Subcontractor
Some maintenance work is carried out by or with the help of an external company or an intersection garage. In this case :
- Fill the name of the company in the Subcontractor field or click on the black arrow and select the company from the list.
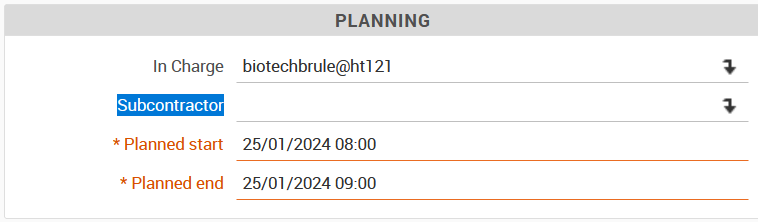
Note : the company need to be already created in MEMO by the Log Manager : F.1.4 Manage a contract with external company
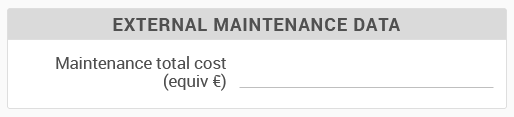
- Fill the cost of the service in euros in the Maintenance total cost
Measurement records
For some WO, you must enter data in the corresponding measurement line for each meter – examples: hours of use, pressure, mileage depending on the type of equipment – at the time of this intervention
- Fill in the VALUE field without its unit for each measurement Automatically, the measurement date will be filled with today's date and the status O (meaning Yes the measurement was made).
Point of vigilance : if you complete the BT on a day other than the date of the intervention, you must change the date of the measurement. Click on it to open the calendar and choose the measurement day by clicking on it.

If you haven't performed the measurement, only change the state to N (meaning No)
- Click SAVE below the WO
The values will appear in a new table “Measurements taken on this work order”
If the value is out of range, it will appear in red in the table.

If you have a measure out of limit, you need to create a corrective WO with the tablet or create the corrective WO from the computer
Maintenance (operations)
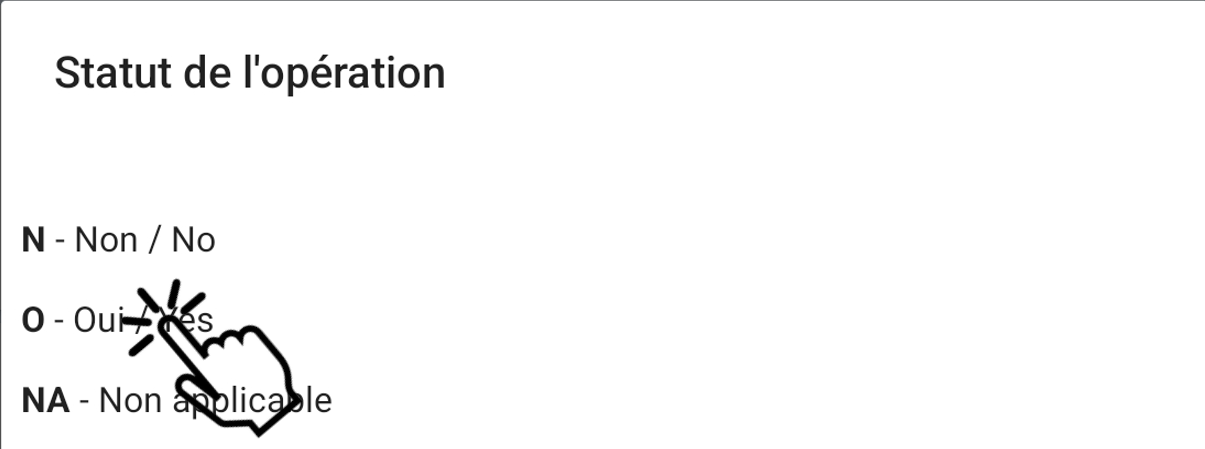
- For each line, you must carry out the action (visual inspection / replace spare part / clean / test / purge...) then fill in the State of the action as O (Yes) to mean that the action has been carried out .

If you notice something broken, or if you realize something unusual in relation to the maintenance line, fill out the comment section.
Note: State corresponds to the state of the action. If during the visual inspection, the chassis is broken, you must put Status: O (Yes) because you will have checked it. Specify in the comments if you were able to repair it or if you need to order a new one.

If it is not possible to carry out the action because the maintenance plan is not adapted to the equipment (example: cleaning a filter which does not exist on this model) check the Skipped box  .
.
Automatically, the Action Status will display NA (Not applicable)
You can specify the reason in the comment if you are completing this type of BT for the first time.

If you haven't carried out the action but it is technically possible (example: spare part not available), fill in the Action Status as N (No) and specify the reason in the comment.

Tip: If you have completed all the actions, after completing the measurements, you can click on the button  to change the Action Status to O for all lines.

Spare parts list
In some WO, MEMO automatically suggests spare parts that must be used.
- Fill the last column REAL QTY with the number of spare parts used

If the spare part(s) used do not appear in the list, you must add them.
- Click on ADD LINES, a popup opens with all the spare parts of the family.
- Filter by typing the model or brand of equipment in the description column
- Select the spare part(s) by clicking on the box
 at the start of the line. You can change pages without losing the selection.
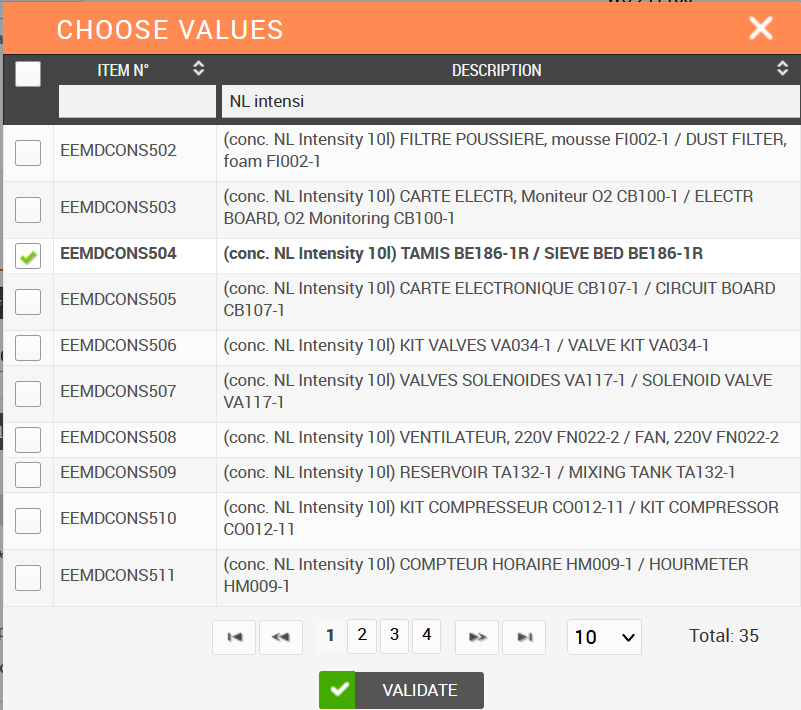
- Click on VALIDATE

The line(s) appear in the spare parts table.
- Complete only the last REAL QTY column with the number of spare parts used
When you will on SAVE, the description of the part will appear.
Execution dates
Point of vigilance: the times are in 24-hour format. If you perform your operation at 2:00 p.m., note 2:00 p.m. More info here
In MEMO, the importance is the time spent performing maintenance. This data is calculated automatically by subtracting the Real end - Real start.
If you carried out your procedure during the same day:
- Click on in the Real field, a popup opens.
- Complete the date and time. You can use the 2 balls to specify the start time or directly modify it in the field below the popup.
- Click CLOSE
- Carry out the same operation for Real End
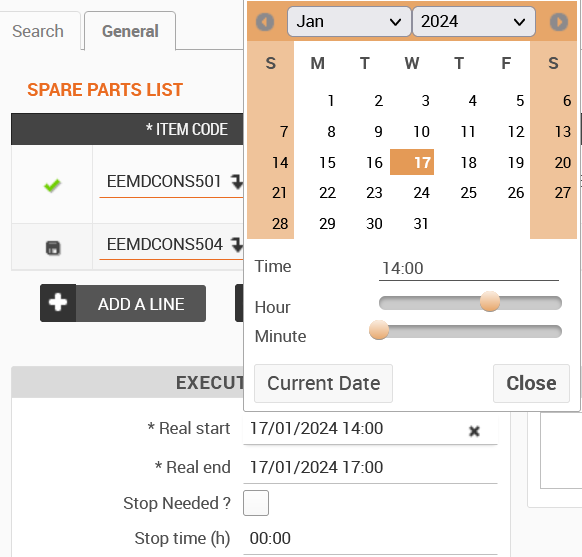
Don't fill "Stop needed"
If the intervention lasted several days:
- Calculate the total intervention time
Example 4 hours of work on Tuesday 16/01/2024 (1 p.m. to 5 p.m.) + 3 hours of work on Wednesday 17/01/2024 (8 a.m. to 11 a.m.) = 7 hours total intervention
- Calculate the start date of the intervention in progress: date, end time of intervention - intervention time
Example: Wednesday 01/17/2024 11 a.m. - 7 a.m. intervention = Wednesday 01/17/2024 4 a.m.
- Click on in the Real start field, and complete this fictitious value (in our example: Wednesday 01/17/2024 4:00 a.m.)
- Click on in the Real end field and complete the real end of intervention value
Stop needed is the time the EQ isn't available for the user but the technician isn't working on it. You can tick "Stop Needed" and fill the number of hours between the 1st and second day
Example 17/01/2024 8 a.m - 16/01/2024 5 p.m = stop needed 15 hours
Report
- Complete the intervention report to inform the supervisor of the results of the intervention as well as to keep a history of all interventions.
If there is nothing in particular, you can keep it very short:

Give more information in case of an unusual situation:

- Click on SAVE
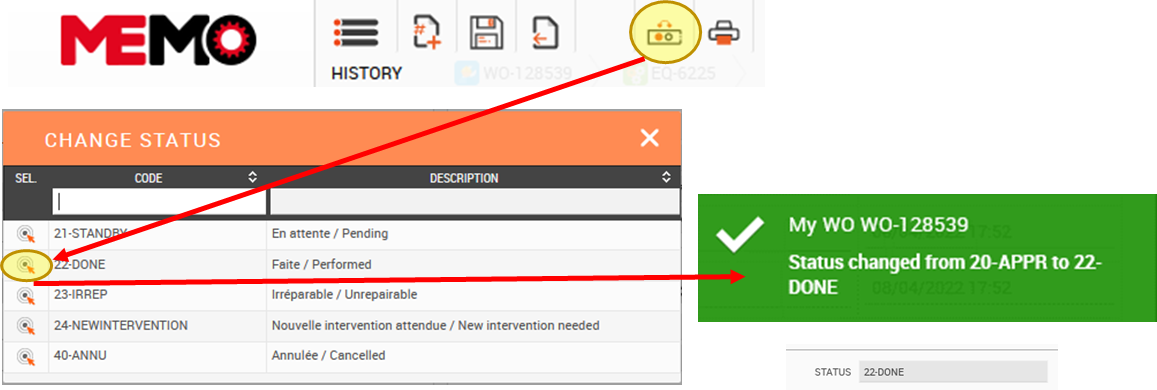
- Once you have entered all information applicable to the Maintenance procedure, change the status of the WO
- Click on a bottom at the end of the WO
- Click the icon at the top of the page to enter the New Status based on the Intervention performed i.e.

OR
Note : if the WO isn’t closed before 7 days after the status changing to “done”, the status of the WO is automatically changed on “30 Ferm/Close”
It is important to CLOSE Work Orders so they are archived and removed from the Technician’s list of My WO.
LIST OF STATUS
Work Requests can take the following Status:
10 – ATTAPPR – Request (not yet approved)
20 – APPR – Request Approved (work order generated)
30 – FERM – Work Request is closed
40 – ANNU – Cancelled (for one reason or another)
Work Orders can take the following Status:
20 - APPR – Work Order Approved (work order generated)
21 - STANDBY – Waiting for parts, other approval etc.
22 – DONE – Maintenance complete
23 – IRREPARABLE – Impossible to repair
24 – NEWINTERVENTION – Other contractor, Coordination
30 – FERM – Work order is closed
40 – ANNU – Cancelled (for one reason or another)
You can access the list of your WOs:
- by clicking on one of the « Work orders »
- by clicking on the menu
 then the option
List of your WOs
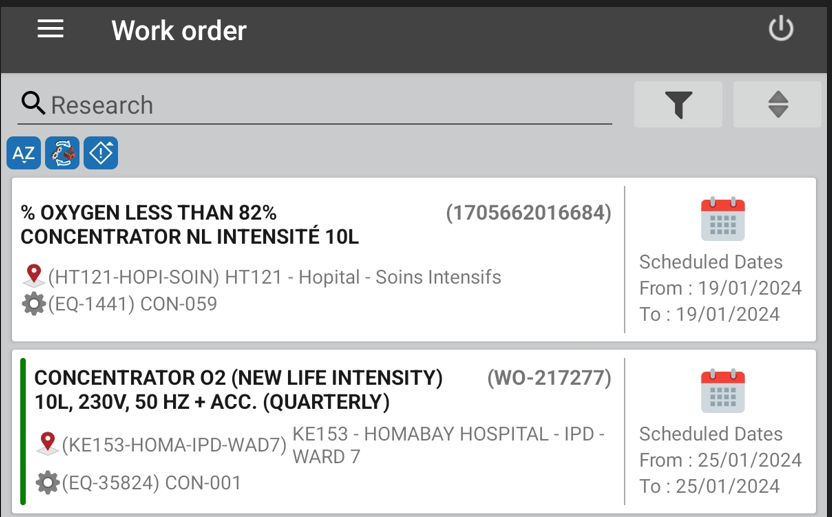
On this page you have the list of WOs assigned to you.
The button  allows to create a new corrective WO where you can find the instructions for create it here.
The button  allows the WO synchronization
If you click on a WO, you can consult it and update it.
You can switch from one tab to another one by clicking on its title in the top bar or by sliding your finger from right to left.
Note : If you use the tablet horizontally, you can see, at the same time, the list of your WOs and the details of the selected WO :
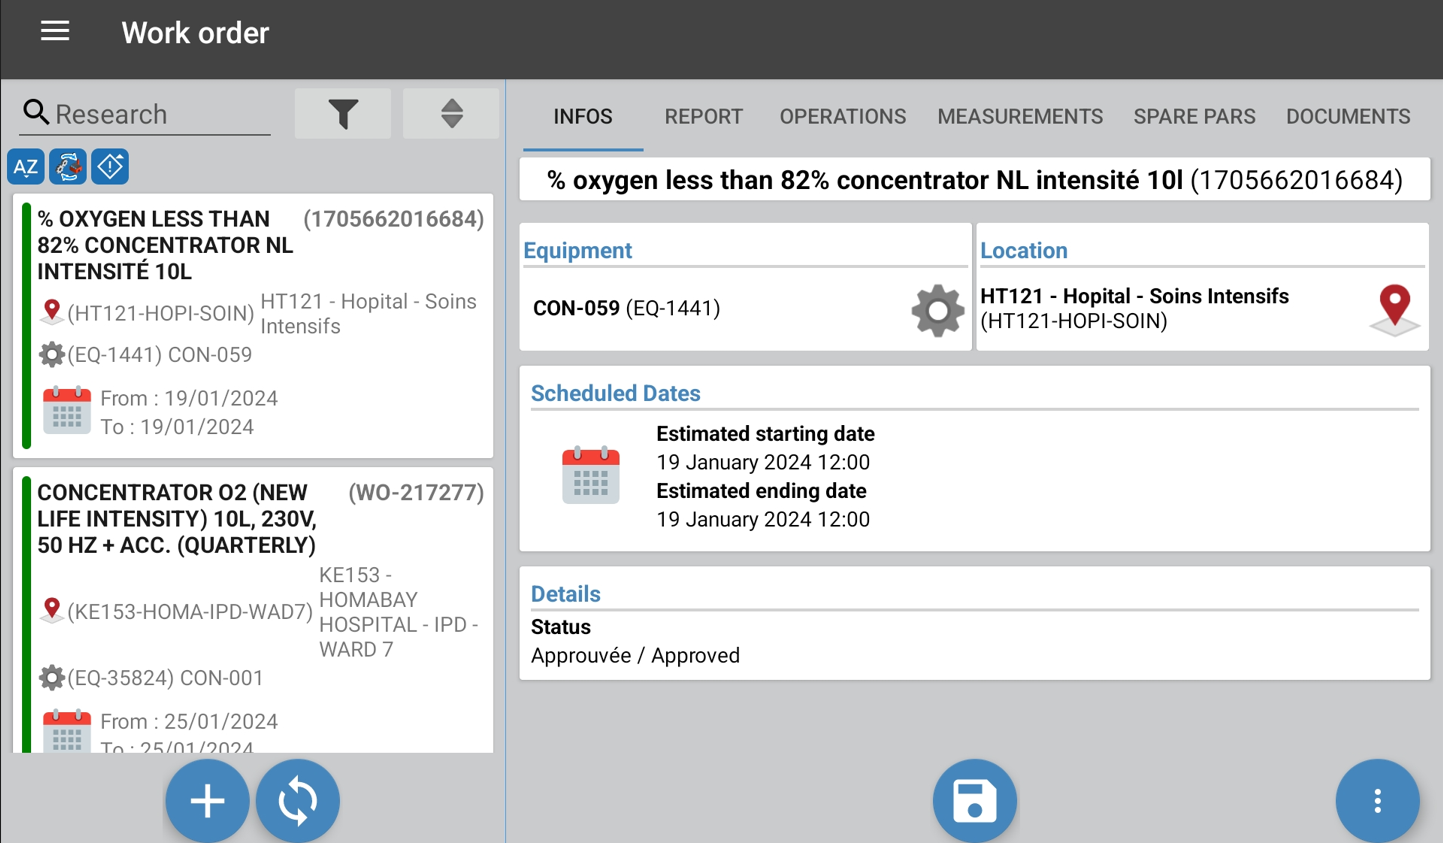
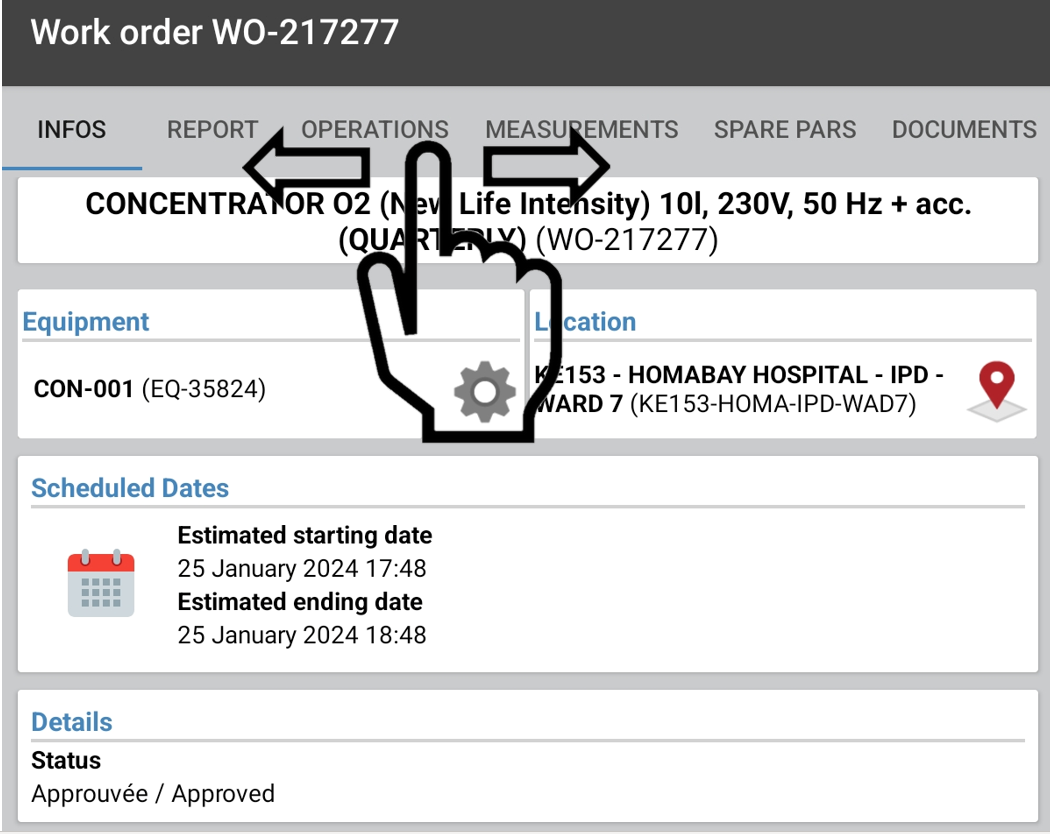
Description of a WO / « INFORMATION » tab
This tab gathers the following information :
- The description of the WO
- The MSF number and the equipment number
The link  will lead you to the equipment sheet
- The MEMO-registered location of the equipment
- Scheduled dates
- The WO status
The button  allows you to save the information entered at any time on entered.
The button 
 allows you to link a document or a picture with the WO.
Description of a WO / « REPORT » tab
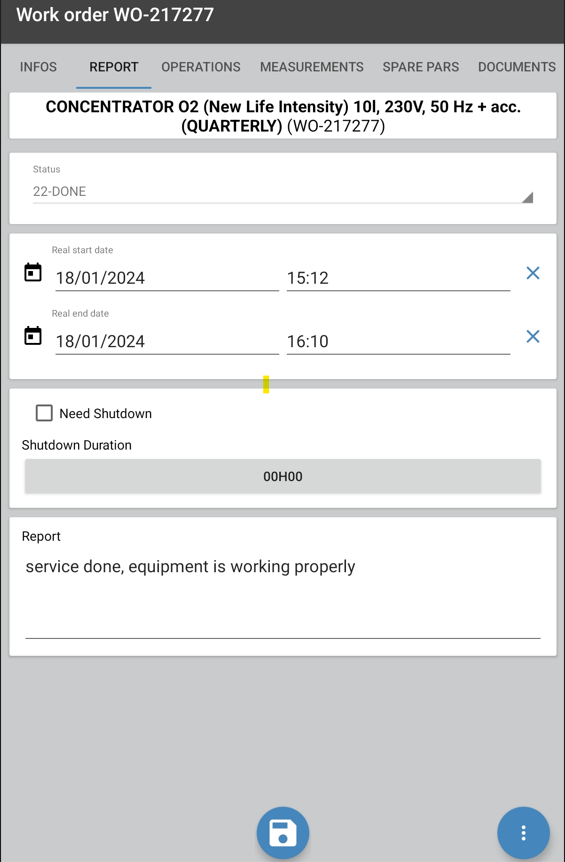
This tab allows you to fill in the general information of the WO.
- the start and end dates and times of the intervention (24h format)
- if a stop has been needed and the duration of this stop
- the report
- When everything is complete, you can save the information with the button S.
- You can indicate the status of the WO :
- « 22-DONE » the maintenance has been done / completed
- « 21-STANDBY » the maintenance cannot be completed (due to a lack of parts, other)
- « 23-IRREPARABLE » it’s not possible to maintain / repair the equipment
- « 24-NEWINTERVENTION » a new intervention is needed to finalize the maintenance
Note: All this information is mandatory. Input them. You can't change the status of the WO without fill them.
Description of a WO / « OPERATIONS » tab
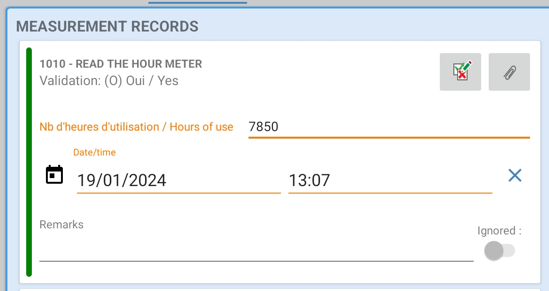
MEASUREMENT RECORDS
This first part is to enter the measurements of the equipment associated with the WO. Examples: Mileage for vehicles, % oxygen for O2 concentrators.
For each of the measures, you can indicate: His value the date and time of recording.
For each measure point, you need to fill
- Its value
Automatically, the date, time, and the validation are filled - If you aren't filled the WO at the same time than the service, modify to put the real date and hour of the measure
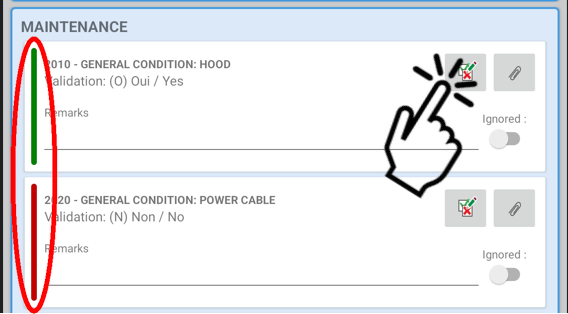
MAINTENANCE
This tab allows to enter the operations of the WO.
Note : Operations are linked to preventive maintenance. If the WO is corrective, the list of its operations is empty.
For each of the operations, you can indicate :
- Status, has it been completed and validated ? (YES or NO
- Green line on the left : Operation completed
- Red line on the left : Operation not completed
Example: I check the power cable, it is damaged: validation: O (Yes) because I checked. I fill the remark to explain what I have done to fix the problem.
- an optional comment (for abnormal situation)
Description of a WO/ « MEASUREMENT » tab
Do not use this tab for preventive BT. The measurement values have already been entered in the operation tab
Description of a WO / « SPARE PARTS » tab
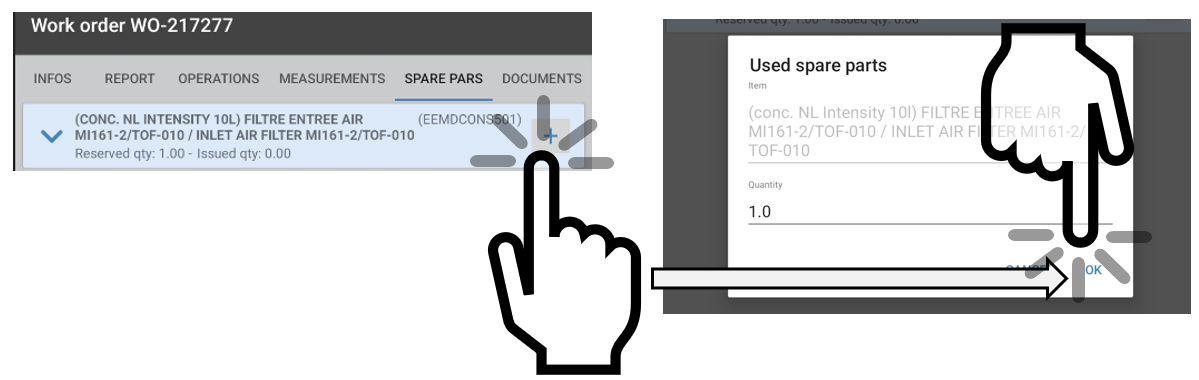
This tab allows you to indicate the spare parts used when treating the WO.
As part of preventive maintenance, spare parts will already be listed. For each one, we can read the quantity to be used.
- Click on the symbol
 at the level of each piece to indicate the actual quantity used.
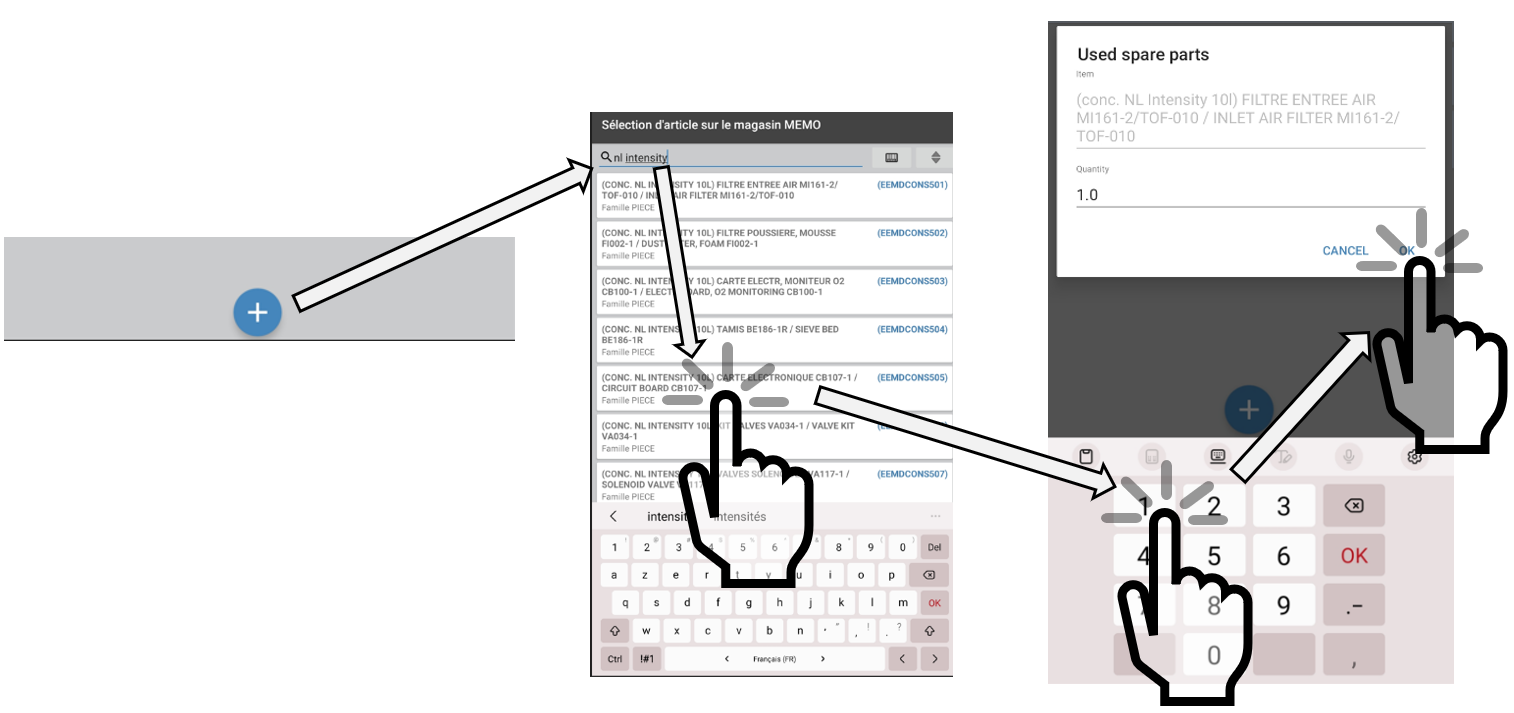
For each maintenance, it is possible to indicate unplanned spare parts.
Point of vigilance, if these spare parts are the part of a corrective intervention following an problem not include in the list of operation (example : out-of-limit measurement), a corrective BT must be created.
- To do this, click on the symbol
 at the end of the page. A page opens which lists all the spare parts.
A search engine allows you to make your selection.
Return to the list of WO and finalization
- To return to the list of WO, you can click on the physical “Back” button on the table
- You can synchronize the WO by clicking on the button synchronize
The Work Order you just made remains visible and will remain visible until it is closed, either by the Log Manager or automatically.